
 فارسی
فارسی English
 العربية
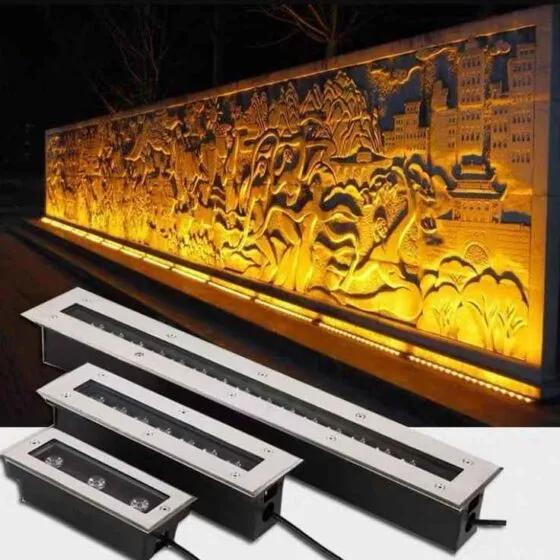
Wall washers are one of the most powerful lighting tools for walls, facades and outdoor spaces. But installing a wall washer requires knowledge and certain tips. But its proper installation is the key to having professional and durable lighting. In this article, we will explain all the steps of installing a wall washer, from choosing the right location to testing and adjusting the light in simple but very specialized language.
First, let’s examine why it is important to install a wall washer properly?
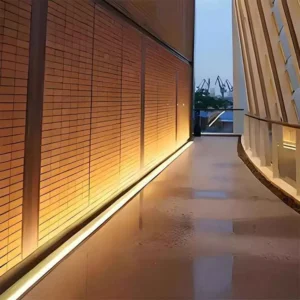
Imagine seeing a luxurious restaurant, a high-rise tower or a beautiful garden with dazzling lights, or imagine seeing a stylish and modern facade with attractive linear lights, or a wall that has gained more depth and beauty through lighting. These effects are only achieved when the wall washer is installed correctly.
This effect is the result of professional installation of wall washers. At Shamim Andisheh Company, we have years of experience implementing lighting projects and we know how a principled installation can transform a simple space into a lighting masterpiece.
But what problems does an unprofessional wall washer installation cause?
Unbalanced lighting: The light is too focused or diffused, creating an inappropriate effect.
Non-standard electrical connections: Causes the risk of electrocution or fire.
Shorter life of the lights: Due to excessive heat, poor connections or lack of proper insulation.
Environmental problems: Dust or water entering the lights and their rapid deterioration.
For this reason, at Shamim Andisheh, we always emphasize that a principled and precise installation determines the difference between ordinary lighting and professional lighting.
What is a wall washer and what are its uses?
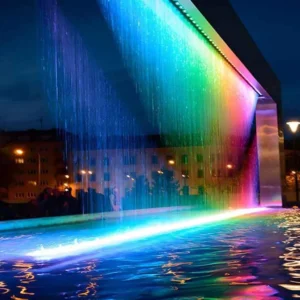
A linear lighting with thousands of uses. Before installing a wall washer, it is best to first understand what exactly a wall washer is used for and why it is a popular choice in modern lighting. Wall washers are LED linear lights that spread light evenly on the wall. These lights are produced in single-color, multi-color RGB and smart types and are used in various environments. Such as:
Lighting the facade of buildings, towers and bridges
Beautifying the garden, villa, restaurant and coffee shop area
Lighting stores, exhibitions and commercial spaces
Creating special lighting effects in indoor and outdoor spaces
Why is a wall washer the best option for lighting?
Low power consumption and strong illumination
Long lifespan (over 50,000 hours)
High resistance to water and dust (waterproof models)
Ability to change the color of the light with a remote control
Easy installation and ability to adjust the angle of light
Now that we understand what the advantages of wall washers are, let’s look at the tools needed to install them and get acquainted with their professional installation.
Tools and equipment required for installing a wall washer
To install a wall washer on a facade or wall, you need the following tools:
A suitable drill and drill bit (for drilling the installation location)
A screw and a roll of wall plugs (to secure the wall washer)
A wrench or electric screwdriver (to close the connections)
Waterproof silicone adhesive (to increase moisture resistance)
Waterproof wire and connector (for electrical connection)
A suitable light controller and driver (depending on the wall washer model)
Step-by-step steps for installing a wall washer on a wall or facade
1. Choosing the right location to install the wall washer
First of all, you must determine the exact angle and position of the wall washer. If you want to have uniform and beautiful lighting, calculate the distance and number of lights correctly.
2. Drilling and installing the bases
Using a suitable drill and drill, drill the locations of the wall washer bases. Screw the plugs into the holes and tighten the bases.
3. Connecting the wiring and driver
Connect the power wires through waterproof connectors to prevent rain and dust. Install the driver in a suitable location to control the power voltage and prevent damage to the LEDs.
4. Adjusting the angle and testing the lighting
After installation, check the angle of the light. Some wall washers have the ability to adjust the angle, which allows the light to be spread in the best possible way.
How to test and adjust the wall washer lighting
After installation, you need to make sure that the lighting has exactly the effect you want. To do this:
Check all connections to make sure there are no problems with the wiring.
Check the wall washer light at night to see if the light is spread properly or if the angle needs to be changed.
If you are using an RGB wall washer, test the colors with the remote controller to see how they look in different combinations.
Note: If the light is too bright or too dim, use a suitable dimmer and controller to adjust the brightness.
Shamim Andisheh’s services in lighting and wall washer installation
At Shamim Andisheh Company, in addition to selling all kinds of wall washers and lighting equipment, we also provide consulting services for the design and implementation of lighting projects. If you need guidance in choosing the right wall washer, designing lighting, or implementing your project, you can contact us.
We are here to help you have the best lighting for your environment. Contact us now to have professional lighting.
Ways to contact Shamim Andisheh
∴Email: shamim@shamimco.com
∴Contact number: 12-44071011-(021)


")

